
Create a Private Amazon Address in 4 Steps
This post may contain affiliate links. Disclosure here.
Does your Amazon storefront show an address you don’t want it to? Here’s is a low cost way to create a private business address!
I will show you the 4 steps I took to create my private business address, so you can too -
Sign up
Verify Your ID
Update on Amazon
Verify with Amazon
1. Sign Up
To begin the process you will want to head over to AnytimeMailbox.com. They have mailboxes starting at $5.99 a month! You can’t even get a McDonalds value meal for that cheap!
Type in the city you would like to have your mailbox in.
I would recommend choosing a mailbox that is located near you because you will need to pick up your address verification postcard. Don’t worry, we will cover more about that in steps 4 and 5.
TIP! You can also have your Amazon returns sent to your private business address.
Select the price and location that works best for you and click “Select Plan”

Be sure to read all the included services and fees in the description such as Open & Scan, Forwarding, Recycle, Local Pickup and Shredding.
You will also need to read the details and choose between Bronze, Silver, Gold, and Unlimited Plan. Here you will also get a chance to save by paying for your mailbox annually instead of monthly if you would like.
Next you will be able to choose your mailbox number, and add details such as your name and company. You will also need to provide your current address, email and phone number.
IMPORTANT! Use the NAME AND CURRENT ADDRESS that MATCH your forms of IDENTIFICATION!
Once you have created your account you are ready to move on to the next step!
2. Verify Your ID
I want to start off by saying… I know your excited, but please - DO NOT move on to step 3 until your mailbox has been verified and approved!
Anytime mailbox will need you to verify your ID and get a USPS 1583 form notarized (which can be done 100% online for an additional fee). This form gives USPS permission to deliver your mail to this private address.
To verify your ID - Simply log into your mailbox and select “Complete Verification” to begin the process, shown below.

Two forms of IDs are required. At least one primary photo ID is required, and a secondary form of ID that verifies your current address.
Acceptable Primary Forms of Photo Identification per Product and Service
U.S. State/Territory/Tribal Driver's or Nondriver's ID Card
Uniformed Service ID
Passport
Certificate of Naturalization
U.S. Access Card
Matricula Consular
U.S. Permanent Resident Card
U.S. University ID Card
Nexus Card
Acceptable Secondary Forms of Identification
U.S. State/Territory/Tribal Driver's or Nondriver's ID Card
Current Lease
Mortgage or Deed of Trust
Home or Vehicle Insurance Policy
Vehicle Registration Card
Voter Card
To notarize the USPS 1583 form - You can choose to use the online notary or get it notarized yourself.
I used the online option and it was an easy step by step process that took about 20-30 minutes.
Once you have completed the ID verification and submitted your notorized form you must wait 2-3 business days for it to be reviewed. You will receive a completion email once the application is approved.
Do not move on to the next step until your mailbox has been approved!
3. Update on Amazon
WARNING! Updating your address with Amazon might trigger a “Your account is at risk of deactivation” warning. Try not to worry! This is normal and will clear up once the verification process is completed.

Once your new Anytime Mailbox is approved you are ready to update your address with Amazon. You can do this by logging into your Seller Central account on your desktop.
Head over to Settings > Business address and phone number > Here is where you will update your address information in Amazon. Be sure to type in your new Anytime Mailbox address exactly!
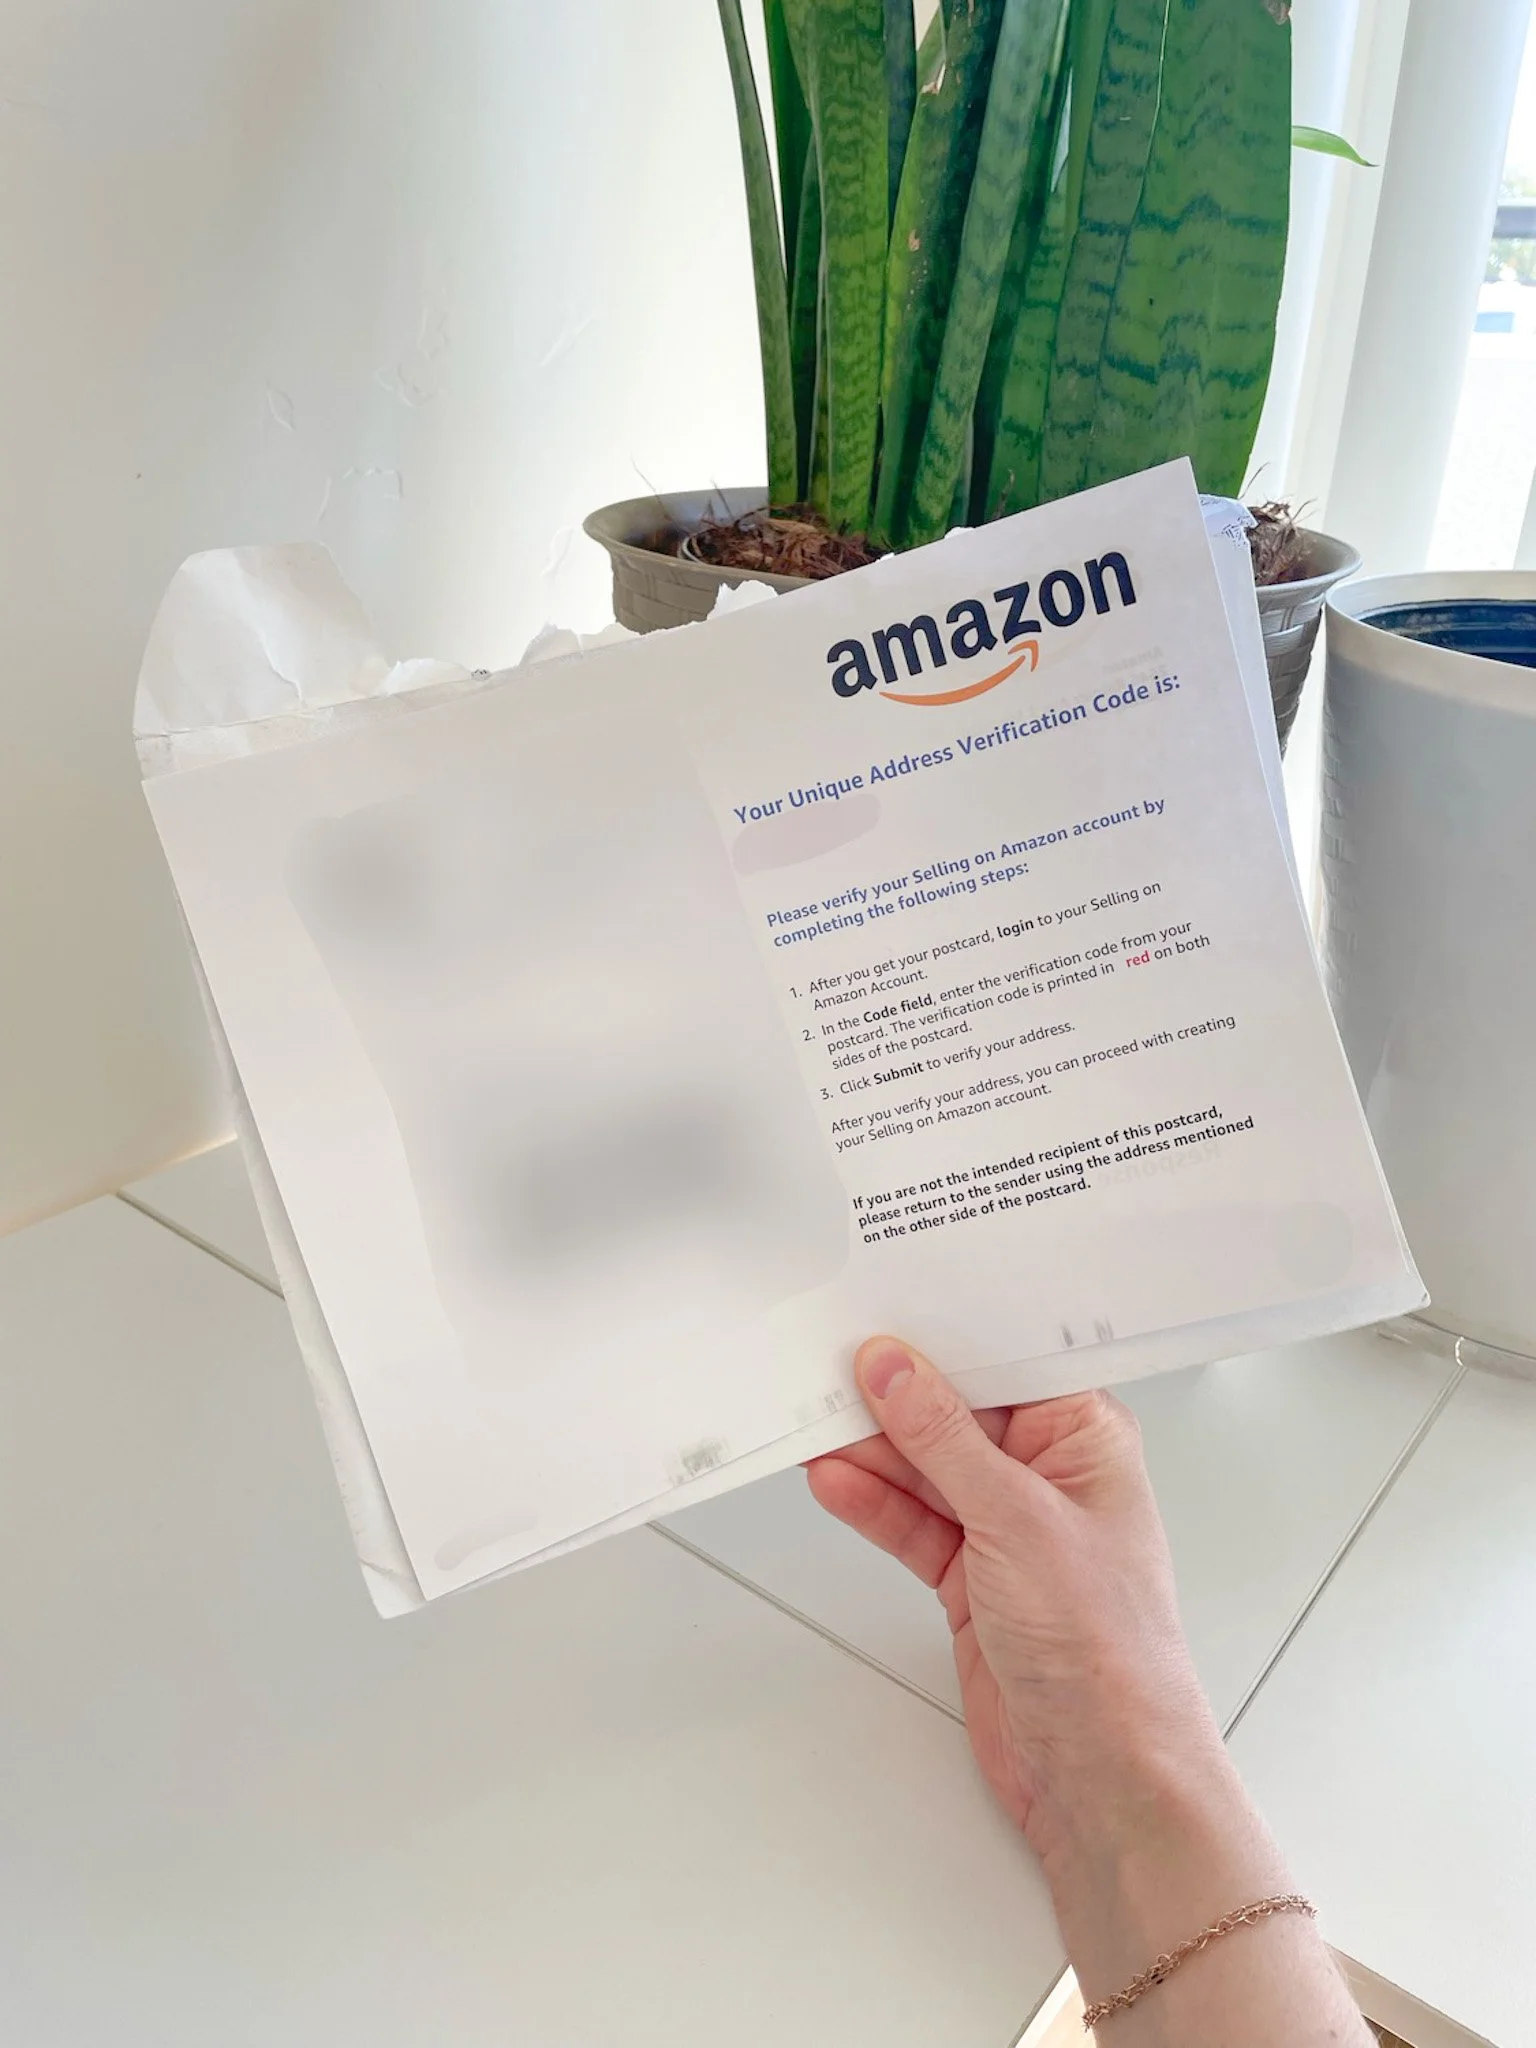
You should now see an address verification request in progress. This is when Amazon sends you a postcard in the mail with a verification code printed on it. You will need to provide that code to Amazon to complete the verification process.

You can see when your verification card is dispatched, in transit, and delivered. You will also be provided with a carrier tracking number so you can track your card that way!
I really liked this feature. I always knew where my verification card was and the expected delivery date.

4. Verify with Amazon
Once you get your verification card you will need to submit your verification code to Amazon for the final step.
You will simply head back to your Seller Central account - Settings > Business address and phone number > Here is where you will input your verification code.
Once you’ve typed in your code you will get a green checkmark and box letting you know your new address has been verified successfully.
Hooray! Your address has officially been updated to a private address. Congrats!

That is how I created a private business address in 4 steps. Once I finished the process, I wished I would have done it sooner!
I hope this blog helps you create your very own private address and even better, provide you peace of mind!
Happy sourcing!


