Water Activated Tape Review
This post may contain affiliate links. Disclosure here.
I've been wanting to use water activated tape for a while now and recently made the switch. You might be wondering what it is? What are the benefit of using it? I’m here to share my recent experience with you that can answer some of these questions!
Here is what we will cover in this water activated tape review -
What is Water Activated Tape?
Tape Options
Tape Dispenser
Application Tips
Cost Comparison
What is Water Activated Tape?
Water Activated Tape also known as WAT can also be referred to as Gummed Tape or Wet Tape.
WAT is paper based tape, whereas typical tape is made with plastics. This makes WAT the environmentally friendly option.
WAT is dry and not sticky to the touch until the adhesive is activated with water. The adhesive is typically starch based but can sometimes be an animal based adhesive. Typical packing tape used acrylic or rubber adhesive. WAT is the environmentally friendly option here, too!
Another key feature of WAT is its strength! The reinforced WAT tape features threads that provide strength and durability. Typical packing tape can be effective for lighter boxes but requires adding additional tape to provide strength!
Tape Options
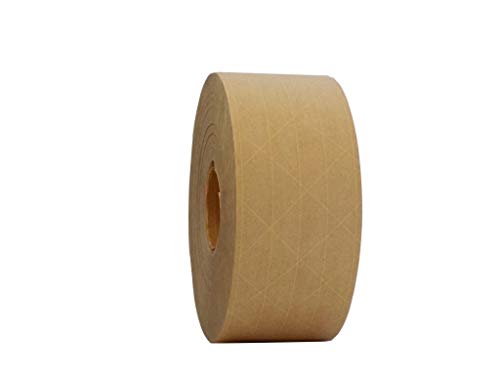
WAT Tape comes in different widths and different lengths.
The most common widths are between 2” and 3”. I prefer using the 3” roll because I tend to ship heavy boxes and I think the 3” tape is easier to line up.
When choosing a length be sure to check with the specs of your tape dispenser. You want to make sure your tape dispenser will accommodate the size of the roll.
The longer the roll is, the wider the roll will be.
Another cool thing about WAT is that it can be printed with designs or even custom logos. This is something you probably wouldn’t be interested in for sending shipments to Amazon via FBA BUT it could be a decorative option for FBM, ebay, etsy or other selling platforms that you ship!

Tape Dispenser
There are a lot of different tape dispensers out there! So what are your options?
The first option is to not use a dispenser at all. Instead you can use a damp sponge or spray bottle. I have not personally tried this method, but it’s an option.
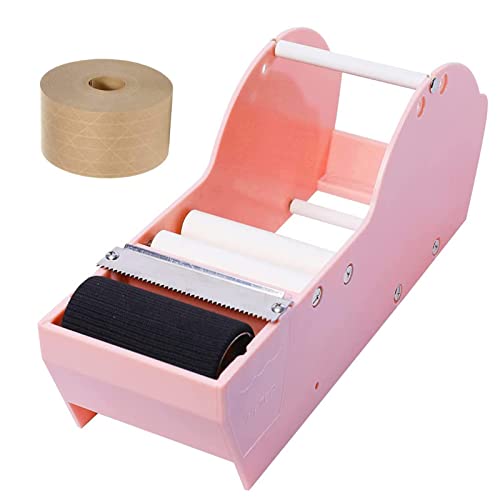
The next option would be to get a manual dispenser. This is an affordable way to start using WAT. I got this super affordable pink one shown below. Don’t worry! It does come in other colors if pink isn’t your thing!

The next options would be to get a semi automatic tape dispenser or fully automatic dispenser (both shown below)
These options are more expensive costing between $200 - $1000. They could also save a lot of time and money in the long run if you are shipping out massive amounts of boxes.
These dispensers can pre-measure your tape quickly and coat the tape evenly with water.


If you’ve never used WAT or don’t ship out massive amounts of boxes I would recommend getting a manual to start with.
If you are familiar with WAT and send out a lot of boxes a semi automatic would probably be a better fit for you.
If you are running some sort of prep center, the fully automatic is going to save you a lot of time and money!
Application Tips
These tips are going to be aimed towards using the manual tape dispenser like the one I have. Simply because it is the only one I have personally used.
These tips probably won’t be helpful if you are using a semi or fully automatic dispenser.
With that said, let’s begin!
It is recommended to use warm water around 100 degrees
I would recommend cleaning your water out and rinsing the roller after each use to prevent build up
When pulling the tape out pull slow and steady to ensure a even coat of water.
When pulling I also like to run my fingers along the top of the tape to ensure coverage
Put your box below your dispenser for quick and easy measuring
Once your tape is ripped and removed from the dispenser I like to start by applying it to one flap first. Here is where you can center the tape and align it with the edge of the box.
Once your first flap is positioned, lay the other flaps down and smooth the tops and sides.
Lastly, I like to rub the surface of the tape to ensure everything is sticking
Trouble Shooting - If you notice an area isn’t sticking because it is dry, simply wet your fingers, rub it on the dry area and press down.

Cost Comparison
Packing tape is expensive! I have spent over $120 on 720 ft of tape in the past year. That is about .166 cents per foot.
I purchased a 375 ft roll of WAT tape for $15.55. That is about .041 cents per foot. That is three times cheaper.
BUT WAIT! There’s more!
When I tape a box with packing tape I use at least 6 strips for lighter boxes and even MORE for heavy boxes. That comes out to at least $1.99 per box. PER BOX!
When I tape a box with WAT I use only 2 strips of tape. That is about .164 cents per box.
That is a ginormous difference!
Conclusion
WAT is environmentally friendly, strong, easy to use, and super cost effective!
I do keep a little packing tape available in my office for taping polybags but as for shipping boxes… I have been completely converted to WAT and I’m not going back!
Latest Videos
Check out some of my recent sourcing videos below